GeekOS之Project1
小插曲
修改MakeFile
和Project0一样,Project1在make depend && make时,也会有错误提示,一步一步来解决:
0.去掉过于严格的编译选项(line 178):
CC_GENERAL_OPTS := $(GENERAL_OPTS) -Werror
改为:
CC_GENERAL_OPTS := $(GENERAL_OPTS)
1.去掉gcc栈保护的选项(line 176):
GENERAL_OPTS := -O -Wall $(EXTRA_C_OPTS)
改为:
GENERAL_OPTS := -O -Wall -fno-stack-protector $(EXTRA_C_OPTS)
修改.bochsrc
# An example .bochsrc file.
# You will need to edit these lines to reflect your system.
vgaromimage: file=/usr/share/bochs/VGABIOS-lgpl-lates
romimage: file=/usr/share/bochs/BIOS-bochs-latest
megs: 8
boot: a
floppya: 1_44=fd.img, status=inserted
#floppya: 1_44=fd_aug.img, status=inserted
log: ./bochs.out
keyboard_serial_delay: 200
vga_update_interval: 300000
mouse: enabled=0
private_colormap: enabled=0
i440fxsupport: enabled=0
# Uncomment this to write all bochs debugging messages to
# bochs.out.  This produces a lot of output, but can be very
# useful for debugging the kernel.
#debug: action=report
Ok,打开bochs模拟器。。。
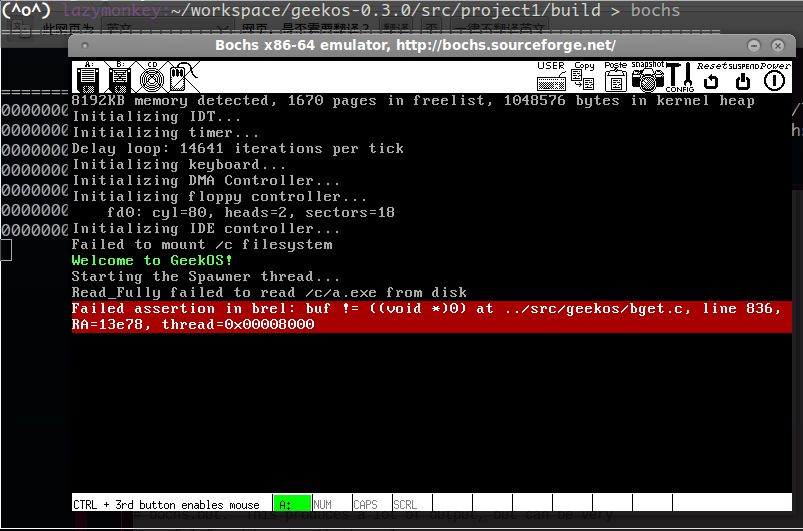
根据经验,一般来说第一次运行bochs时,屏幕是会打印接下来需要完成的任务,重新看看make之后生成了什么。发现除了生成fd.img还生成了另一个磁盘镜像文件diskc.img,想想Project1给我们的任务,是需要执行一个可执行文件(ELF格式),是放在diskc.img这个磁盘镜像中,所以bochs还需要挂载diskc.img。
$ man bochsrc
在romimage:这段中可以看到:
ata0: , ata1: , ata2: or ata3:

          These options enables up to 4 ata channels. For each channel the two base io addresses and the irq must be specified.
          ata0 and ata1 are enabled by default, with the values shown below.

          Examples:
ata0: enabled=1, ioaddr1=0x1f0, ioaddr2=0x3f0, irq=14
      ata1: enabled=1, ioaddr1=0x170, ioaddr2=0x370, irq=15
      ata2: enabled=1, ioaddr1=0x1e8, ioaddr2=0x3e0, irq=11
      ata3: enabled=1, ioaddr1=0x168, ioaddr2=0x360, irq=9


      ata[0-3]-master: or ata[0-3]-slave:

      This defines the type and characteristics of all attached ata devices:
      type=       type of attached device [disk|cdrom]
      path=       path of the image
      mode=       image mode [flat|concat|external|dll|sparse|vmware3|undoable|growing|volatile], only valid for disks
      cylinders=  only valid for disks
      heads=      only valid for disks
      spt=        only valid for disks
      status=     only valid for cdroms [inserted|ejected]
      biosdetect= type of biosdetection [none|auto], only for disks on ata0 [cmos]
      translation=type of translation of the bios, only for disks [none|lba|large|rechs|auto]
      model=      string returned by identify device command
      journal=    optional filename of the redolog for undoable and volatile disks

      Point  this  at a hard disk image file, cdrom iso file, or a physical cdrom device.  To create a hard disk image, try
      running bximage.  It will help you choose the size and then suggest a line that works with it.

      In UNIX it is possible to use a raw device as a Bochs hard disk, but WE DON'T RECOMMEND IT.

      The path is mandatory for hard disks. Disk geometry autodetection works with images created by bximage if CHS is  set
      to  0/0/0  (cylinders are calculated using  heads=16 and spt=63). For other hard disk images and modes the cylinders,
          heads, and spt are mandatory. In all cases the disk size reported from the image must be exactly C*H*S*512.

              The mode option defines how the disk image is handled. Disks can be defined as:
              - flat : one file flat layout
              - concat : multiple files layout
              - external : developer's specific, through a C++ class
              - dll : developer's specific, through a DLL
              - sparse : stackable, commitable, rollbackable
              - vmware3 : vmware3 disk support
              - undoable : flat file with commitable redolog
              - growing : growing file
              - volatile : flat file with volatile redolog

              The disk translation scheme (implemented in legacy int13 bios functions, and used by older operating systems like MS-
                      DOS), can be defined as:
              - none : no translation, for disks up to 528MB (1032192 sectors)
              - large : a standard bitshift algorithm, for disks up to 4.2GB (8257536 sectors)
              -  rechs  :  a revised bitshift algorithm, using a 15 heads fake physical geometry, for disks up to 7.9GB (15482880
                      sectors). (don't use this unless you understand what you're doing)
              - lba : a standard lba-assisted algorithm, for disks up to 8.4GB (16450560 sectors)
              - auto : autoselection of best translation scheme. (it should be changed if system does not boot)

              Default values are:
              mode=flat, biosdetect=auto, translation=auto, model="Generic 1234"

              The biosdetect option has currently no effect on the bios

              Examples:
              ata0-master: type=disk, path=10M.sample, cylinders=306, heads=4, spt=17
              ata0-slave:  type=disk, path=20M.sample, cylinders=615, heads=4, spt=17
              ata1-master: type=disk, path=30M.sample, cylinders=615, heads=6, spt=17
              ata1-slave:  type=disk, path=46M.sample, cylinders=940, heads=6, spt=17
              ata2-master: type=disk, path=62M.sample, cylinders=940, heads=8, spt=17
              ata2-slave:  type=disk, path=112M.sample, cylinders=900, heads=15, spt=17
              ata3-master: type=disk, path=483M.sample, cylinders=1024, heads=15, spt=63
              ata3-slave:  type=cdrom, path=iso.sample, status=inserted
手册已经说得很清楚了,想要挂载diskc.img到ata0,就需要在.bochsrc中加上如下内容:
ata0: enabled=1, ioaddr1=0x1f0, ioaddr2=0x3f0, irq=14
ata0-master: type=disk, path=diskc.img, cylinders=40, heads=8, spt=64
打开模拟器。。。
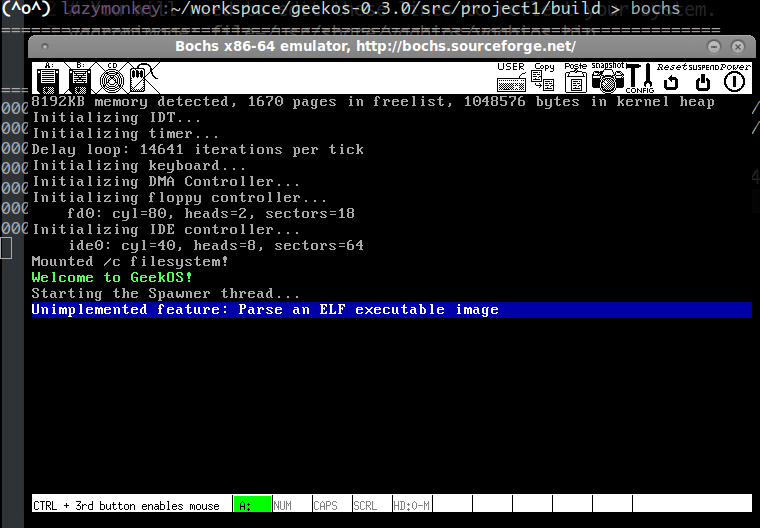
终于正常了!现在可以继续任务了(~o~)0o。。。
Begining
官方说明
Introduction
In this project you will write code to parse an executable file in ELF format and pass the result of the parsing to a program laoder we provide.
Required Reading
This project will require you to understand the ELF executable format.You will need to read the ELF Executable Format <http://www.x86.org/ftp/manuals/tools/elf.pdf> documentation. In this project, you will need to be able to parse the ELF program headers in order to find out how to load an executable file’s text (code) and data into process memory.
Project Synopsis
This project will require you to change the src/geekos/elf.c. Your only task is to implement the Parse ELF Executable() function. This involves reading the program headers of an ELF executable to find the file offset, length, and user address for the executable’s text and data segments. Based on this information,you should fill in the Exe Format data structure passed as a parameter. This data structure will be used by the loader to determine how to load the executable. The loader is already implemented for you.
Loading the Executable
GeekOS, like other operating systems, uses files to store executable programs. These files are in ELF format.We have provided you with a simple read-only filesystem for this project, plus a test file that you will load.The test file is src/user/a.c, and after compilation and building, GeekOS will see it as /c/a.exe. When GeekOS boots up, it reads /c/a.exe into memory, calls your parsing code from Parse ELF Executable() and starts a kernel-mode thread that will run the a.exe code. Loading ELF executables is fairly straightforward. You will need to locate the ELF program headers.These headers will describe the executable’s text and data segments. 1 As you parse the ELF executable, you will fill in the fields of an Exe Format data structure, which is a high level representation of how to load data from the executable file into memory.
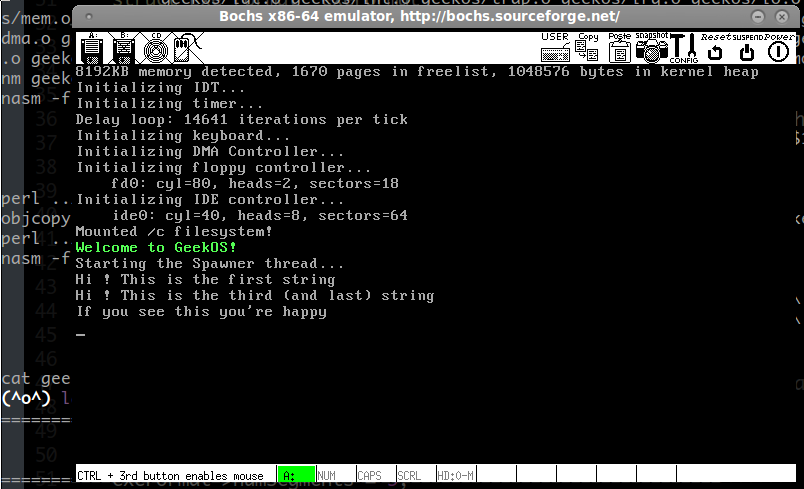
Testing Your Project
If you’ve done everthying correctly, when you start Bochs you should see this output:
Hi ! This is the first string
Hi ! This is the second string
Hi ! This is the third (and last) string
If you see this you’re happy
开胃菜
看看我们需要修改的函数:
    /**
     * From the data of an ELF executable, determine how its segments
     * need to be loaded into memory.
     * @param exeFileData buffer containing the executable file
     * @param exeFileLength length of the executable file in bytes
     * @param exeFormat structure describing the executable's segments
     *   and entry address; to be filled in
     * @return 0 if successful, < 0 on error
     */
    int Parse_ELF_Executable(char *exeFileData, ulong_t exeFileLength,
            struct Exe_Format *exeFormat)
    {
        TODO("Parse an ELF executable image");
    }
其中exeFileData是指向a.exe内容开头的指针,exeFileLength是该文件的长度,exeFormat则为指向结构体struct Exe_Format的指针。 结构体struct Exe_Format的定义在elf.h中可以看到:
    struct Exe_Format {
        struct Exe_Segment segmentList[EXE_MAX_SEGMENTS]; /* Definition of segments */
        int numSegments;        /* Number of segments contained in the executable */
        ulong_t entryAddr;      /* Code entry point address */
    };
包含了对需要载入内存的块的定义、包含于可执行文件的块的个数和接口指针的地址。 结构体struct Exe_Segment的定义:
    /*
     * A segment of an executable.
     * It specifies a region of the executable file to be loaded
     * into memory.
     */
    struct Exe_Segment {
        ulong_t offsetInFile;    /* Offset of segment in executable file */
        ulong_t lengthInFile;    /* Length of segment data in executable file */
        ulong_t startAddress;    /* Start address of segment in user memory */
        ulong_t sizeInMemory;    /* Size of segment in memory */
        int protFlags;       /* VM protection flags; combination of VM_READ,VM_WRITE,VM_EXEC */
    };
包含块的偏移量、长度、内存起始地址、在内存中所占大小以及一个标志量(其实就是文件的属性,可读、可写、可执行)。 直接看定义,和unix/Linux是一样的:
    /*
     * Bits in flags field of programHeader.
     * These describe memory permissions required by the segment.
     */
    #define PF_R    0x4  /* Pages of segment are readable. */
    #define PF_W    0x2  /* Pages of segment are writable. */
    #define PF_X    0x1  /* Pages of segment are executable. */
关于如何加载elf的信息可以参考这里 再看两个结构体:
    /*
     * ELF header at the beginning of the executable.
     */
    typedef struct {
        unsigned  char  ident[16];
        unsigned  short type;
        unsigned  short machine;
        unsigned  int   version;
        unsigned  int   entry;
        unsigned  int   phoff;
        unsigned  int   sphoff;
        unsigned  int   flags;
        unsigned  short ehsize;
        unsigned  short phentsize;
        unsigned  short phnum;
        unsigned  short shentsize;
        unsigned  short shnum;
        unsigned  short shstrndx;
    } elfHeader;

    /*
     * An entry in the ELF program header table.
     * This describes a single segment of the executable.
     */
    typedef struct {
        unsigned  int   type;
        unsigned  int   offset;
        unsigned  int   vaddr;
        unsigned  int   paddr;
        unsigned  int   fileSize;
        unsigned  int   memSize;
        unsigned  int   flags;
        unsigned  int   alignment;
    } programHeader;
现在可以对应前面的知识来分析a.exe所包含的内容,找到我们需要的:
readelf -h a.exe
可以看到:
    ELF Header:
        Magic:   7f 45 4c 46 01 01 01 00 00 00 00 00 00 00 00 00
        Class:                             ELF32
        Data:                              2's complement, little endian
        Version:                           1 (current)
        OS/ABI:                            UNIX - System V
        ABI Version:                       0
        Type:                              EXEC (Executable file)
        Machine:                           Intel 80386
        Version:                           0x1
        Entry point address:               0x1000
        Start of program headers:          52 (bytes into file)
        Start of section headers:          4412 (bytes into file)
        Flags:                             0x0
        Size of this header:               52 (bytes)
        Size of program headers:           32 (bytes)
        Number of program headers:         3
        Size of section headers:           40 (bytes)
        Number of section headers:         7
        Section header string table index: 4
$ readelf -l a.exe
可以看到:
    Program Headers:
        Type           Offset   VirtAddr   PhysAddr   FileSiz MemSiz  Flg Align
        LOAD           0x001000 0x00001000 0x00001000 0x000a2 0x000a2 R E 0x1000
        LOAD           0x0010c0 0x000020c0 0x000020c0 0x00028 0x00028 RW  0x1000
        GNU_STACK      0x000000 0x00000000 0x00000000 0x00000 0x00000 RW  0x4
代码
现在就可以开始填代码了! 最终的Parse_ELF_Executable():
    /**
     * From the data of an ELF executable, determine how its segments
     * need to be loaded into memory.
     * @param exeFileData buffer containing the executable file
     * @param exeFileLength length of the executable file in bytes
     * @param exeFormat structure describing the executable's segments
     *   and entry address; to be filled in
     * @return 0 if successful, < 0 on error
     */
    int Parse_ELF_Executable(char *exeFileData, ulong_t exeFileLength,
            struct Exe_Format *exeFormat)
    {
        //TODO("Parse an ELF executable image");
        int i;
        elfHeader *ehdr = (elfHeader *) exeFileData;
        programHeader *phdr = (programHeader *) (exeFileData + ehdr->phoff);
        struct Exe_Segment *segment = exeFormat->segmentList;
        for (i = 0; i < 3; i++) {
            segment->offsetInFile = phdr->offset;
            segment->lengthInFile = phdr->fileSize;
            segment->startAddress = phdr->vaddr;
            segment->sizeInMemory = phdr->memSize;
            phdr++;
            segment++;
        }
        /*
         * of cource, you can assign one by one, you can see Program Headers
         * by "$ readelf -l exeFile"
         */

        exeFormat->numSegments = 3;
        exeFormat->entryAddr = 0x1000;
        return 0;
    }
打开模拟器:
 评论 (0)